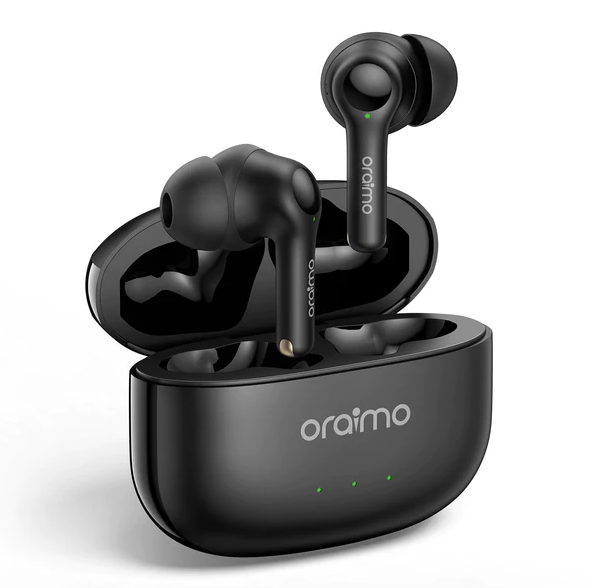
Wondering how to turn on Oraimo Freepods 3 without the case? Don’t worry; we’ve got you covered. This guide explains how you can turn on the FreePods even when the case is not available.
Quick Tip: To turn on Oraimo FreePods 3 without the case, simply press and hold the touch-sensitive area on both earbuds simultaneously for about 5 seconds until you see the LED indicator light up. Once they’re on, you can pair them with your device and start listening to your favorite music or taking calls.
Read this post further to better understand how this works and how best to use the freepods.

Why Turn On Oraimo FreePods 3 Without the Case?
Here are a few common scenarios where you’ll need to turn on your Oraimo FreePods 3 without the case:
- You’ve temporarily misplaced or lost the charging case but still want to use your earbuds.
- The case’s battery is completely drained, and you don’t have a way to charge it right away.
- You want to quickly use your earbuds without going through the process of taking them out of the case.
How To Turn On Oraimo FreePods 3 Without the Case [Step-by-Step Guide]
Here’s a step-by-step guide on how to turn on your Oraimo FreePods 3 without the case:
Step 1: Locate the FreePods
The first step, of course, is to find the device. They might be in your ears, a bag, or even your pocket. Ensure they are easily accessible.
Step 2: Identify the Earbud Buttons
Each earbud has a touch-sensitive button on it. These buttons are essential for powering on the earbuds and controlling various functions.
Step 3: Power On the Earbuds
With your best finger around the button, you can turn on the earbuds without the case. Here’s how to do it:
- Take one of the earbuds in your hand. It doesn’t matter if it’s the left or right one; the process is the same for both.
- Locate the button on the earbud. It’s usually on the side facing outwards when you place the earbud in your ear.
- Press and hold the button for a few seconds (usually about 3-5 seconds). You’ll know the earbud is powered on when you see an LED indicator light up. This light typically blinks blue.
- Repeat the same process for the other earbud.
If you’re new to this product, make sure you check out our guide on how to use Oraimo FreePods 3.
Step 4: Enter Pairing Mode
Once the FreePods are powered on, they may automatically enter pairing mode, indicated by a blinking blue and red LED light. This means the earbuds are ready to be connected to a device. If you want to pair them with a new device, you can do so through your device’s Bluetooth settings.
And if you’re having issues with the device, you might need to check out our guide on how to reset Oraimo FreePods 3.
What If You Lost Your FreePods Charging Case?
The charging case of your airbuds is as important as the EarPods themselves. Unless the FreePods have designated charging port on each pair (which is rare), you need the charging case to charge the device.
So, when you lost your FreePods case, you need a replacement. Mind you, getting a replacement is not very easy, as most producers of EarBuds don’t produce replacement case. But you may find one at a used market, like jiji or Facebook online marketplaces.
Final Thoughts
And there you have it – a simple guide on how to turn on your Oraimo FreePods 3 without the case. It’s a handy trick to know when you want to use your earbuds quickly or in situations where the case is unavailable or out of battery.
Remember, technology is all about making our lives more convenient, and these earbuds certainly deliver on that front. So, next time you’re in a hurry to enjoy your music or take a call, just follow these steps, and your Oraimo FreePods 3 will be ready to go.
Now, go ahead, power up those earbuds, and savor the wireless audio experience. Happy listening!
